Why Is Your Keurig Not Pumping Water And How To Fix It

Keurig machines are extremely reliable, with decades of engineering behind their construction and functioning. As with any machine though, problems can arise.
A machine like a Keurig that has hot water running through it is especially prone to problems with the liquid.
One of the most common issues with a Keurig machine is the water pump not pumping water.
Common as in “occasionally happens”.
Don’t think it’s something that most Keurig owners will have to face. Not normally.
Identifying the problem is the first step. When you press the brewing button you hear some noise, caused by the water pump attempting to push the water through. But if you do not see water nor coffee coming out, you know that your problem is the Keurig not pumping water.
So, how do you fix it?
Descaling
The most likely reason for a problem like this is limescale presence, caused by a lack of proper descaling (or any descaling). If you haven’t been descaling your Keurig machine often enough or forgot to do it for many months, limescale has probably been building up inside the machine.
This results in clogging the water pump. There are a few steps that can fix the problem if limescale presence is the cause.
Descaling the Keurig will be the first try to fix the issue.
Fill the machine’s reservoir with water and your descaling solution of choice.
Place a large mug on the drip tray.
Then attempt to start the descaling process by brewing, repeatedly, with the water and descaling solution.
Don’t forget at the end to spotlessly clean the machine by brewing a whole reservoir with clean water. The rinse should get rid of the weird smell and taste left by the descaling.
If the Keurig machine was able to pump the water and complete the descaling process, this should fix your problem. Otherwise, the cause of the water pump not pumping water lies elsewhere. There are a few other possibilities to check.
Milliard Citric Acid
Lucy’s Family Owned – Natural Distilled White Vinegar
Air In The Line
Air in the pipelines may block the water pump and prevent the Keurig machine from working properly. Seems improbable, but it happens. To fix this, a simple process can be followed:
Fill the water reservoir up to about a quarter full.
Lift the reservoir up and down, rapidly, until small air bubbles can be seen coming up from the water intake, that is placed at the bottom of the reservoir
If you see the bubbles it means that the air is being flushed out. Keep agitating the reservoir until no more bubbles are visible
Fill up the reservoir
Try to normally brew
This way all air present in the systems should have left the machine and the Keuring should be able to pump water again. If that isn’t the case, a few more fixes can be attempted.
More Water Please Error
You may have seen an error from the Keurig screen saying “More Water Please Error”. This may be caused by either the wrong type of water or the reservoir sending false signals to the machine, confusing it. The error can be eliminated with these steps:
Refill the reservoir with fresh water, to the maximum level. It is possible that the Keurig will start brewing again just by doing this. If not, check the next step
Empty the reservoir
Clean all the removable components of the machine by hand. Rinse thoroughly
Be sure that the valve is not clogged in any way. It should be in a condition as close to when you first bought the Keurig machine as possible
Fill the reservoir and try brewing now. If still, it doesn’t pump water, proceed to the next step
In the reservoir, there’s a float that runs along the top of it. If it is messed up at the bottom, it may send wrong water level signals to the machine, confusing it and preventing it from pumping water
Try shaking and tapping the Keurig machine to resettle the float
Either the first or the other two fixes should make the “More Water Please Error” go away. It is possible that one or more of the steps will need to be repeated. So don’t get discouraged if after the first try it does nothing. Some persistence is needed, unfortunately.
Damaged Pump
It is possible that none of the previous methods apply to you or have fixed the Keuring from not pumping water. The possibility that the water pump is damaged is something else to take into consideration then.
The pump wears out over time and it is natural that at some point it will break, completely or partially. If none of the previous methods made the Keurig machine work again, it is time to find a replacement for the water pump.
Make sure to purchase the exact one that matches the features of your current Keurig machine, as a different one may not work in it.
It may be worth calling a professional to perform the replacement of the water pump. By itself, it’s not a very hard task but a technician will know where to unscrew and what not to touch when replacing the water pump, which a normal user won’t.
For ease of mind, calling a professional will make sure nothing will go wrong while substituting the water pump.
General Solution
Generally, to fix issues with your Keurig machine, including it, not pumping water, a global disassembling and reassembling of the machine may be in order. It is not a hard task, but one that has to be done carefully in order not to break anything else. It can be normally done by anybody. Make sure that you have the following tools:
A screwdriver
A small knife
A toothpick or something equivalent, not of metal
A plastic thumb-tack
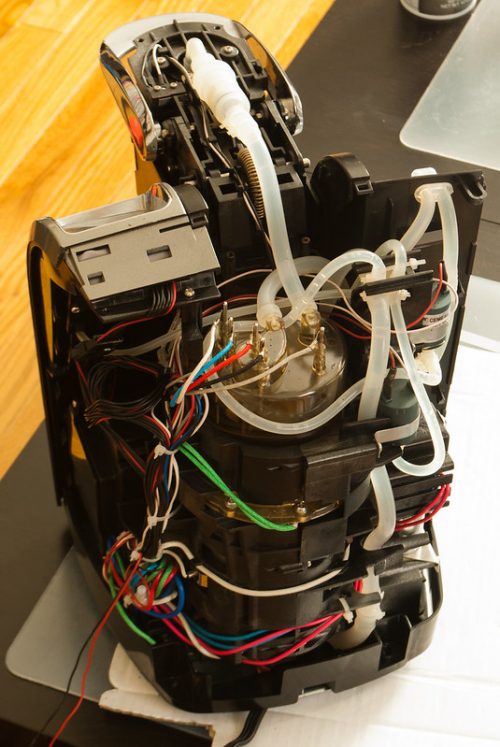
Start removing the cover under the handle. That’s the first step and the one that will allow you to access the inside of the machine. You’ll see a blade that feeds the water into the pack, a rubber hose, and another blade under it.
With the toothpick, carefully poke the three holes in the upper blades, to remove any residual ground coffee that has stuck to it.
Remove anything else that shouldn’t be there, like limescale, tiny solid remains from the coffee or water, and anything that definitely doesn’t belong to the machine.
Check that all the hose ends are fine and nothing blocks them. Check everything you did, and make sure that any piece is back where it was when you first opened the machine.
When you’re satisfied with the cleaning, put all the removed parts back in place and close the lid.
If the cause of the Keurig not pumping water was not due to a damaged pump, one of the above methods should have fixed it. To avoid it next time, keep proper maintenance of the machine. Regularly descaling it, cleaning it from time to time, and maybe once a year disassembling and thoroughly cleaning the interior of it.
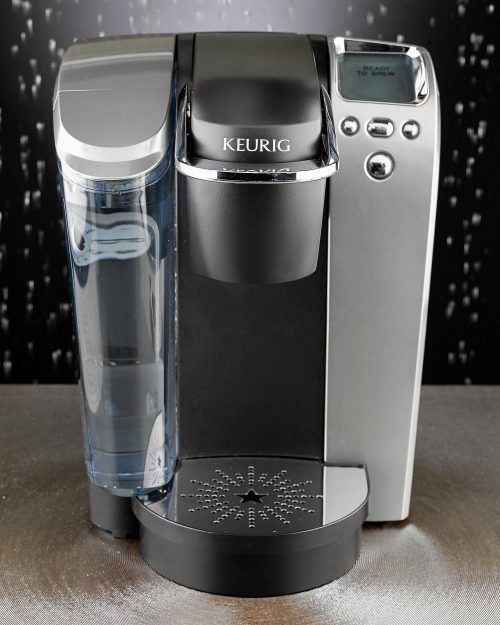
Keurig K-Classic Coffee Maker
Hopefully, the maintenance routine will keep the Keurig pumping water. And the problem should not return anytime soon and you will prolong the life of your Keurig.
Related Articles
How Do You Descale A Keurig – Easy Way To Clean!
Best Descaling Solutions for Coffee Makers – Review & How To Guide