How To Clean Your Favorite Coffee Maker

Among all the activities correlated with drinking coffee, it is easy to bet that cleaning your coffee equipment is the least enjoyable and the one that more often gets delayed. Most people don’t even think of cleaning their coffee makers until a sour, over-burnt flavor creeps into their coffee and leaves them unable to enjoy it anymore.
Cleaning is not glamorous, but it is a necessity. Mold can form in damp places like the water reservoir of your coffee maker or in not perfectly dried coffee brewers in general. Just running hot water through it, as when brewing, isn’t enough to prevent this nasty stuff from polluting the environment where your coffee is being brewed.
Furthermore, over time old brews will leave traces inside any coffee maker and that can influence the final taste of the coffee. And surely not in a pleasant way. In order to always have the best coffee you can brew with the method of your choice, cleaning your tools is a must. But how often? And how?
Not every coffee maker is the same, obviously, and not everyone has to be cleaned in the same way either. The way the coffee runs through it and where the water resides in it makes a difference in the how and how often cleaning that specific coffee maker. Let’s see first then how often you should consider cleaning your coffee equipment, and then we will go through each of the most common coffee makers to see how they should be cleaned.
How often should you clean a coffee maker?
Ideally, daily. But not every part of your coffee maker needs such a constant cleaning. Some can be cleaned once a month or so. Let’s see what should be cleaned every day, after every use.
All the removable parts, like the lid, the metal filter, the carafe where coffee is brewed, should be at the very least rinsed with water after every use. Better, cleaned with dish soap and thoroughly rinsed after. Make sure that no traces of soap remain in any part of your coffee maker: not only is it a hazard for your health, but your coffee will taste quite funky.
Some of these removable parts are dishwasher safe. Check the manuals of your coffee maker to see which are and which aren’t. A moderately hot cycle in the dishwasher will be more than enough to clean these parts.
More difficult to clean will be the non-removable parts. Things like the interior of a coffee maker, the internal tubes inside which the coffee runs through, or a non-removable water reservoir will be much harder to clean. Luckily, they don’t need to be cleaned up daily, once a month it will suffice.
If you can, run hot water through your coffee maker once after a few brews to flush the coffee residuals and once a month think of a more thorough cleaning. Disassemble as best as you can the coffee maker and use here gentle soap with water, scrubbing where necessary. Vinegar or lemon and salt are great alternatives to commercial soaps.
Do make sure to pay regular attention to the water reservoir or any parts of your coffee maker that may have water in it for a prolonged period. These are the places where mold can occur and at the very least flushing all the water and naturally drying the humidity will prevent molding.
Once a month would be best to use soap water to clean these parts as well, as soap is able to prevent molding for longer than only hot water.
How to clean every coffee maker
As we said, every coffee maker necessitates different cleaning methods and routines. Let’s then see how to clean some of the most common coffee makers in detail.
Drip Coffee Maker
A drip coffee maker is a complex machine, with many parts making it. Cleaning it is not easy, generally speaking. It necessitates multiple steps.
First, make sure that grounds, dust or any other debris is removed from the drip coffee maker. Use a damp cloth where you can or a small brush in the narrowest places. Once the solids are out of the machine, start the cleaning cycle.
Pour half of vinegar and half of water in the water tank, and use a paper filter to catch any other solids that may have escaped your previous manual cleaning. Brew around half the vinegar and water mixture. Let it stay for about half an hour in the coffee maker. Then finish brewing it all. Remove the paper filter and have a full brewing cycle of clean water.
These steps would be the basics. Most probably you won’t need anything else, but occasionally you may want to scrub with a cloth the carafe to remove any markings or coffee residuals. Don’t use anything that may scratch it though.
Follow the instructions on the manual of your drip coffee maker to make a full descaling of the machine on a regular schedule to avoid limescale or calcium deposits.
Pour over
The pour over is much easier to clean than a drip coffee maker but with a single caveat: you can’t easily access the bottom half of it. You won’t probably need to clean it all more often than twice a month, but do remember to rinse it thoroughly after each use.

To actually clean your pour over, proceed as follows: fill the bottom half of it with room temperature water at which you will add a handful of ice cubes or crushed ice. Add four teaspoons of salt, one of water, and another of lemon juice.
Swirl the mixture so it passes over every part of your pour over coffee maker. The ice and salt will be abrasive enough to scrub away most of the dirt without damaging the glass.
Once cleaned, pour it all down the drain and rinse it with cold water. Avoid hot water here as the difference in temperature with the salty iced water may break the glass of the pour over. If any dirt remains, you may either repeat this procedure or use a gentle brush with a bit of dish soap to scrub it away manually.
Cold Brewer
Cold brew coffee makers are generally a pitcher with a filter basket where the coffee grounds are. Therefore, they should be easy to disassemble and clean separately. Try to remove every part you can from the main body and proceed to clean each one with dish soap and a gentle scrub separately. Make sure that all the parts have perfectly dried up before reassembling.
This should be done ideally after every batch, but can be delayed to up to once a month. Daily it will suffice to rinse the filter and, if you notice it is dirtier than usual, use a brush with some soap as well.
French Press
The French Press is a mix of a few elements that can luckily be easily disassembled. First steps to clean a french press would be to remove the plunger and fill the press with warm water. Just swirl it to absorb most of the coffee grounds in it. Then pour the water over a mesh strainer in the sink.
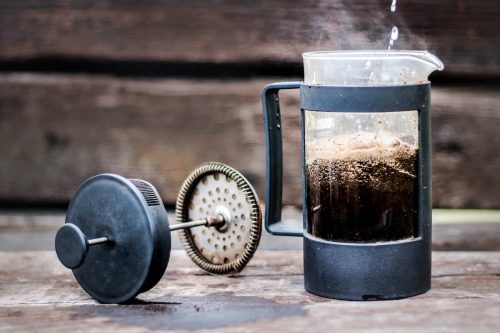
Use either a brush or a cloth with dish soap to scrub the interior of the French press, so oils and stains will be removed. Rinse thoroughly the whole French press, plunger included, before brewing with it again.
It would be clearly best if you could clean like this the French press after every use. A daily rinsing with hot water will be sufficient for a while though, leaving the larger cleaning for once in two weeks.
Aero Press
The Aero Press is very easy to clean. Simply rinse the main body and wipe off the rubber seal around the plunger. If you think the interior needs more cleaning, rub any residue remains with a damp cloth and dish soap. Or just throw it in the dishwasher as the Aero Press is dishwasher safe.
Do clean this little coffee maker after every use, though. Other than that, it is a very easy coffee tool to maintain.
Percolator
Regularly rinsing any percolator coffee maker with warm water should be sufficient to keep it healthy and working for many years. Occasionally, though, you may want to give it a more thorough cleaning.
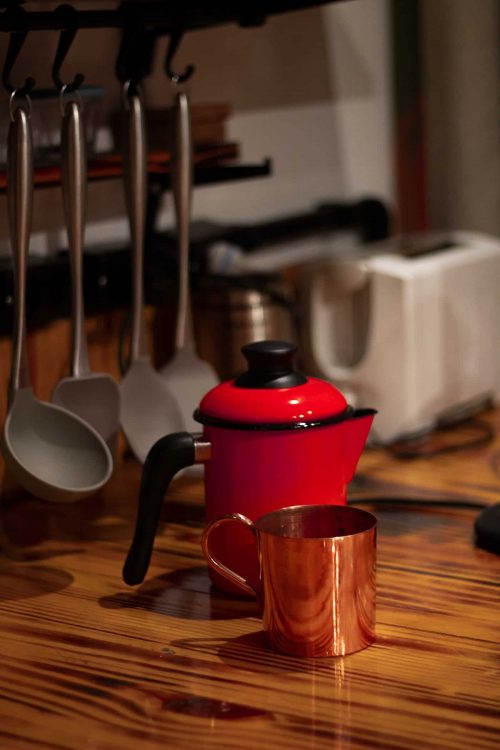
To do so, fill the percolator with water. Add three tablespoons of baking soda. Turn it on and let it do a full brewing cycle. Once the water has naturally cooled down, scrub the inside of the percolator with a brush. Discard the water and rinse it very well. Then do another cycle with half water and half vinegar. Scrub, rinse and let it dry.
Once a month this double brewing cycle will be sufficient to keep the percolator coffee maker in optimal state.
Signs to clean your coffee maker
As you have noticed by now, there’s not a general rule that you can follow on how often a coffee maker should be cleaned. It depends on how often you use it, how much coffee you brew, the type of water and coffee grounds you use and so on. More importantly than a precise schedule would then be to learn to recognize the signs that indicate you should clean your coffee maker.
The first sign is if your coffee tastes odd. That is a direct indication that elements that shouldn’t be present in the coffee are instead.
If the coffee maker takes slightly longer to brew or is louder than normal, that also indicates that solid residues have accumulated inside it and make the brewing more difficult for the machine. Similarly, if the coffee maker doesn’t brew at all or spills coffee, it is a very urgent sign that it is dirty inside and potentially breaking up. Clean it immediately.
This for coffee makers that are not manual, of course. In the case of the likes of an Aero Press or a pour over you may want to pay special attention to the taste of the coffee and the visual state of it inside. If it is not very close to how you first bought it, clean it as soon as you can.
Pro Tips
Use the dishwasher whenever possible. Many parts of any coffee maker are dishwasher safe, make sure you exploit this by saving time and energies with a good dishwasher cycle.
Be mindful of the taste of your coffee. It is the first and earliest indicator that your coffee maker needs cleaning. Also, if you can test if the water you’re using for brewing is hard or very hard. That will mean you must pay special attention to the accumulation of limescale or calcium inside the coffee maker. Have a good amount of vinegar or professional descaling mixtures ready for frequent descaling of your machine then. In the worst cases, descaling may be necessary up to once a month.
Those who have access to soft water may need to worry about descaling once a year or so.
Try to make a point of disassembling your coffee maker for cleaning once a month, at least. While it may seem unnecessary, it will for sure prevent the machine breaking earlier than it could have.